Recycling our packaging material
Have you ever thought that packaging material could be more than just waste?
What if we told you that you can make something creative and useful out of our packaging materials?
We have some ideas here that will make your heart beat faster!
Imagine that with just a few simple steps and a little glue you could create a beautiful envelope or even a beautiful bowl. Now you can create amazing things that are as unique as you are!
Envelope

Envelope
Step1:
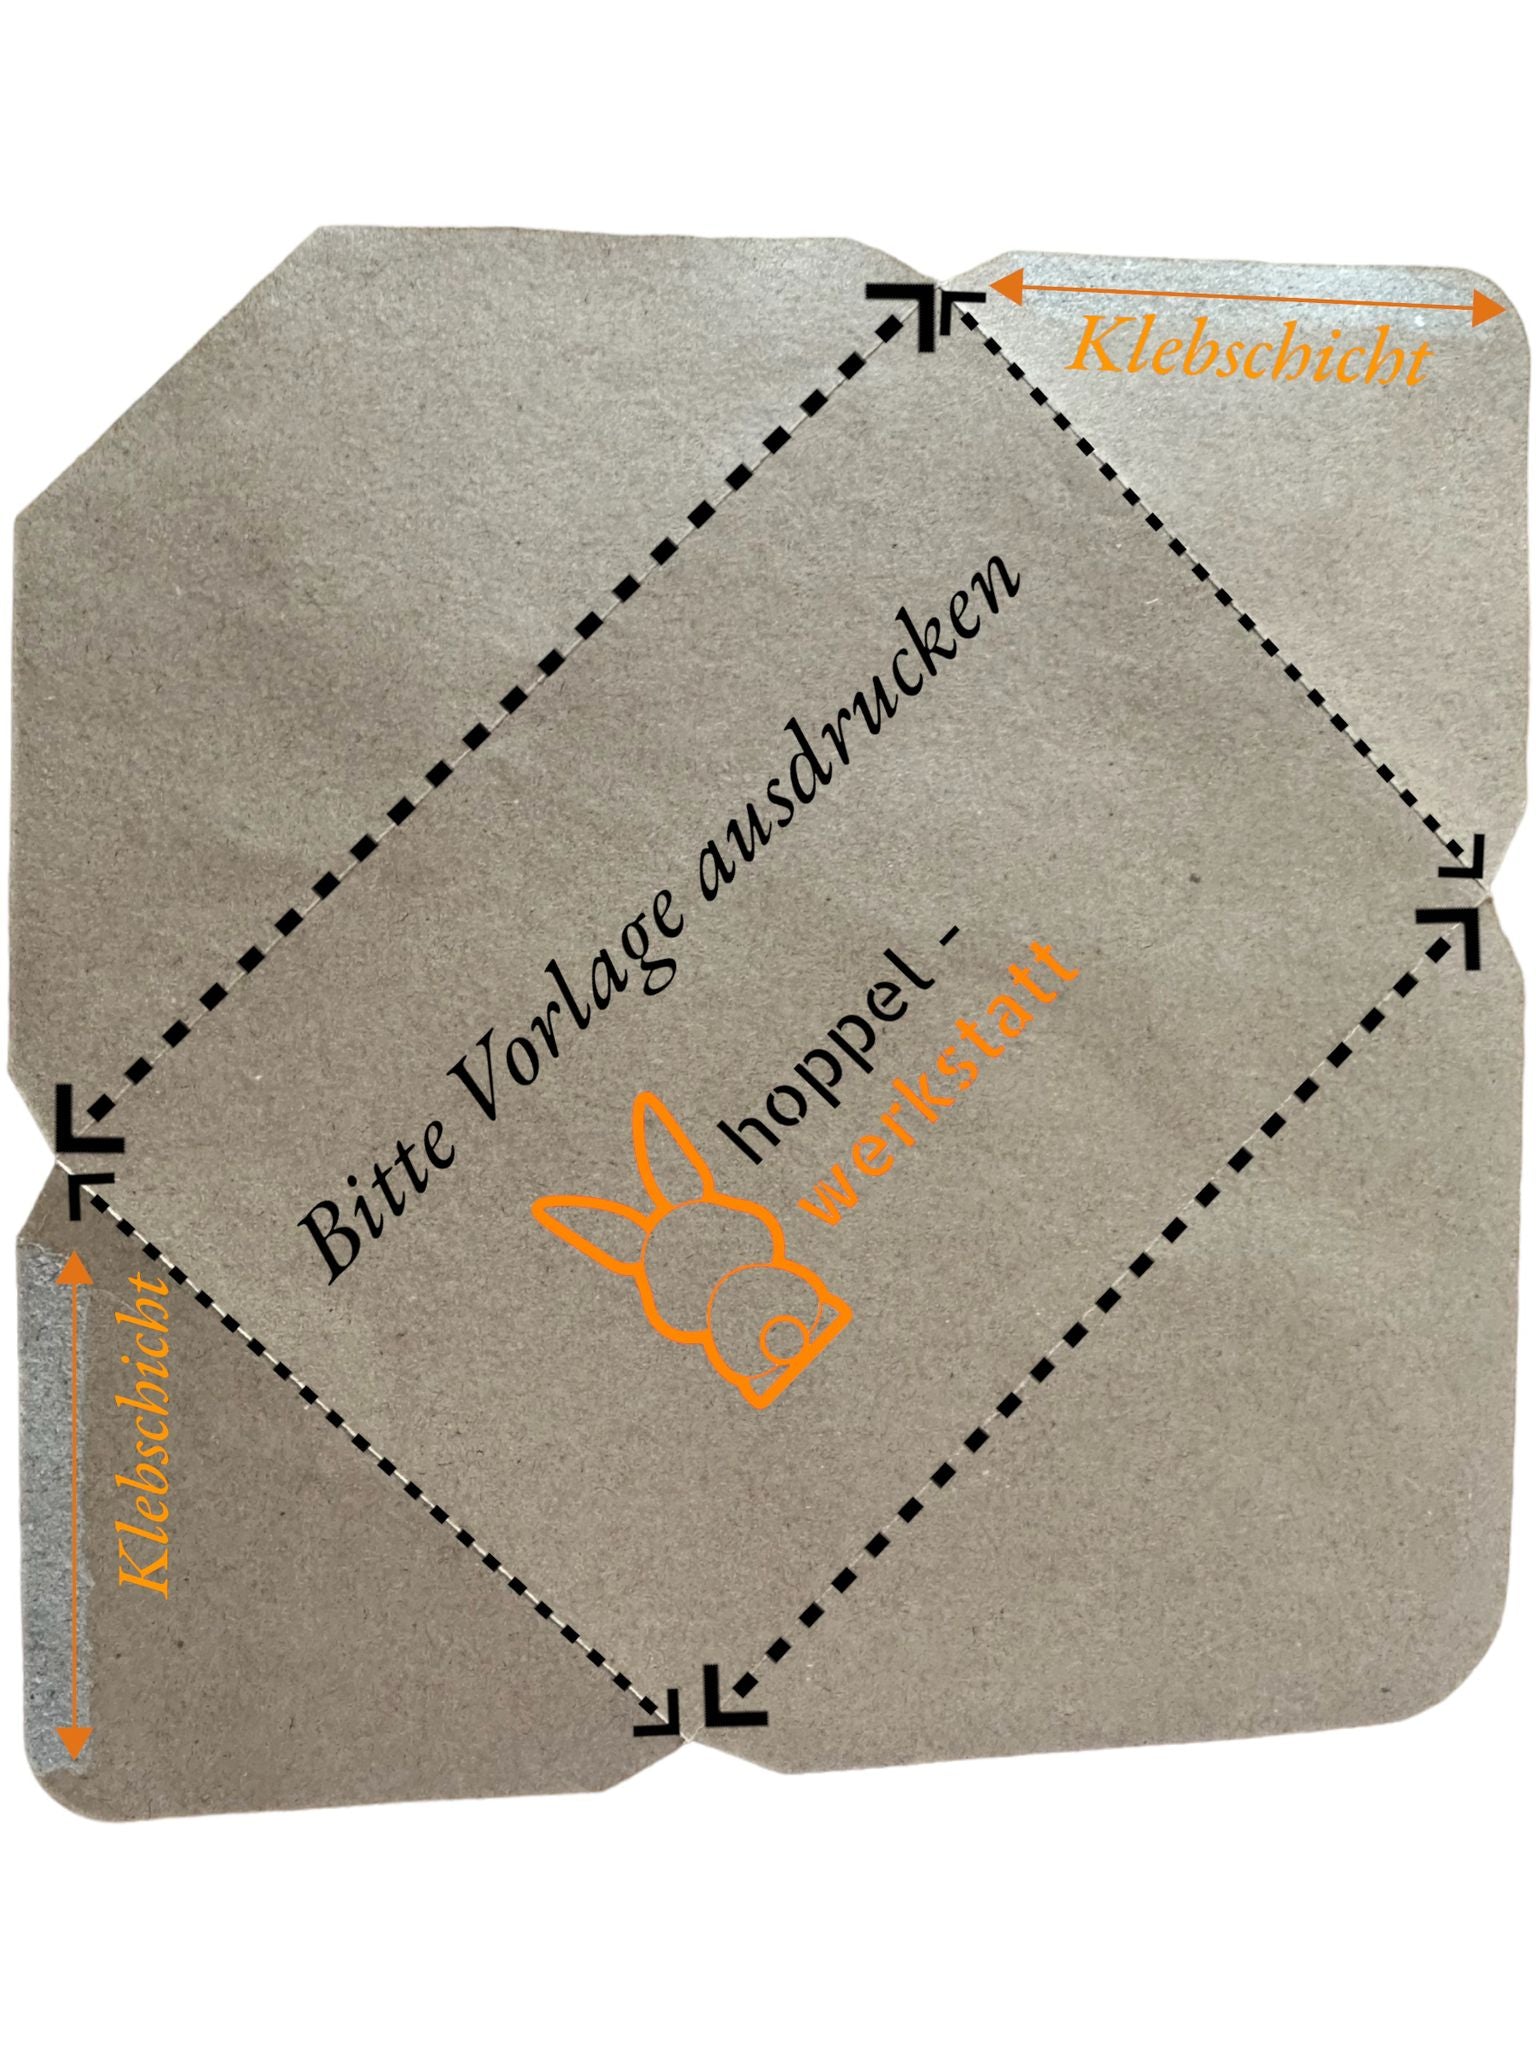
First you have to place the template on your paper, fix it a bit and then cut it out along the envelope.
Step 2:
Now the paper is folded along the dashed lines, the side triangles are folded inwards and the bottom flap is folded upwards and glued.
Then the top flap is folded downwards.
your envelope is ready!
The great thing about this is that you can let your creativity run wild with this guide and you can reuse your printed template at any time. You can use different types of paper and formats and decorate your envelope however you like. And once you've got the hang of it, why not fold several of them?
This way you always have the right envelope to hand for future occasions.
So what are you waiting for? Let's craft together and turn our packaging material into something useful and beautiful!
Paper bags

Paper bags
Step1:
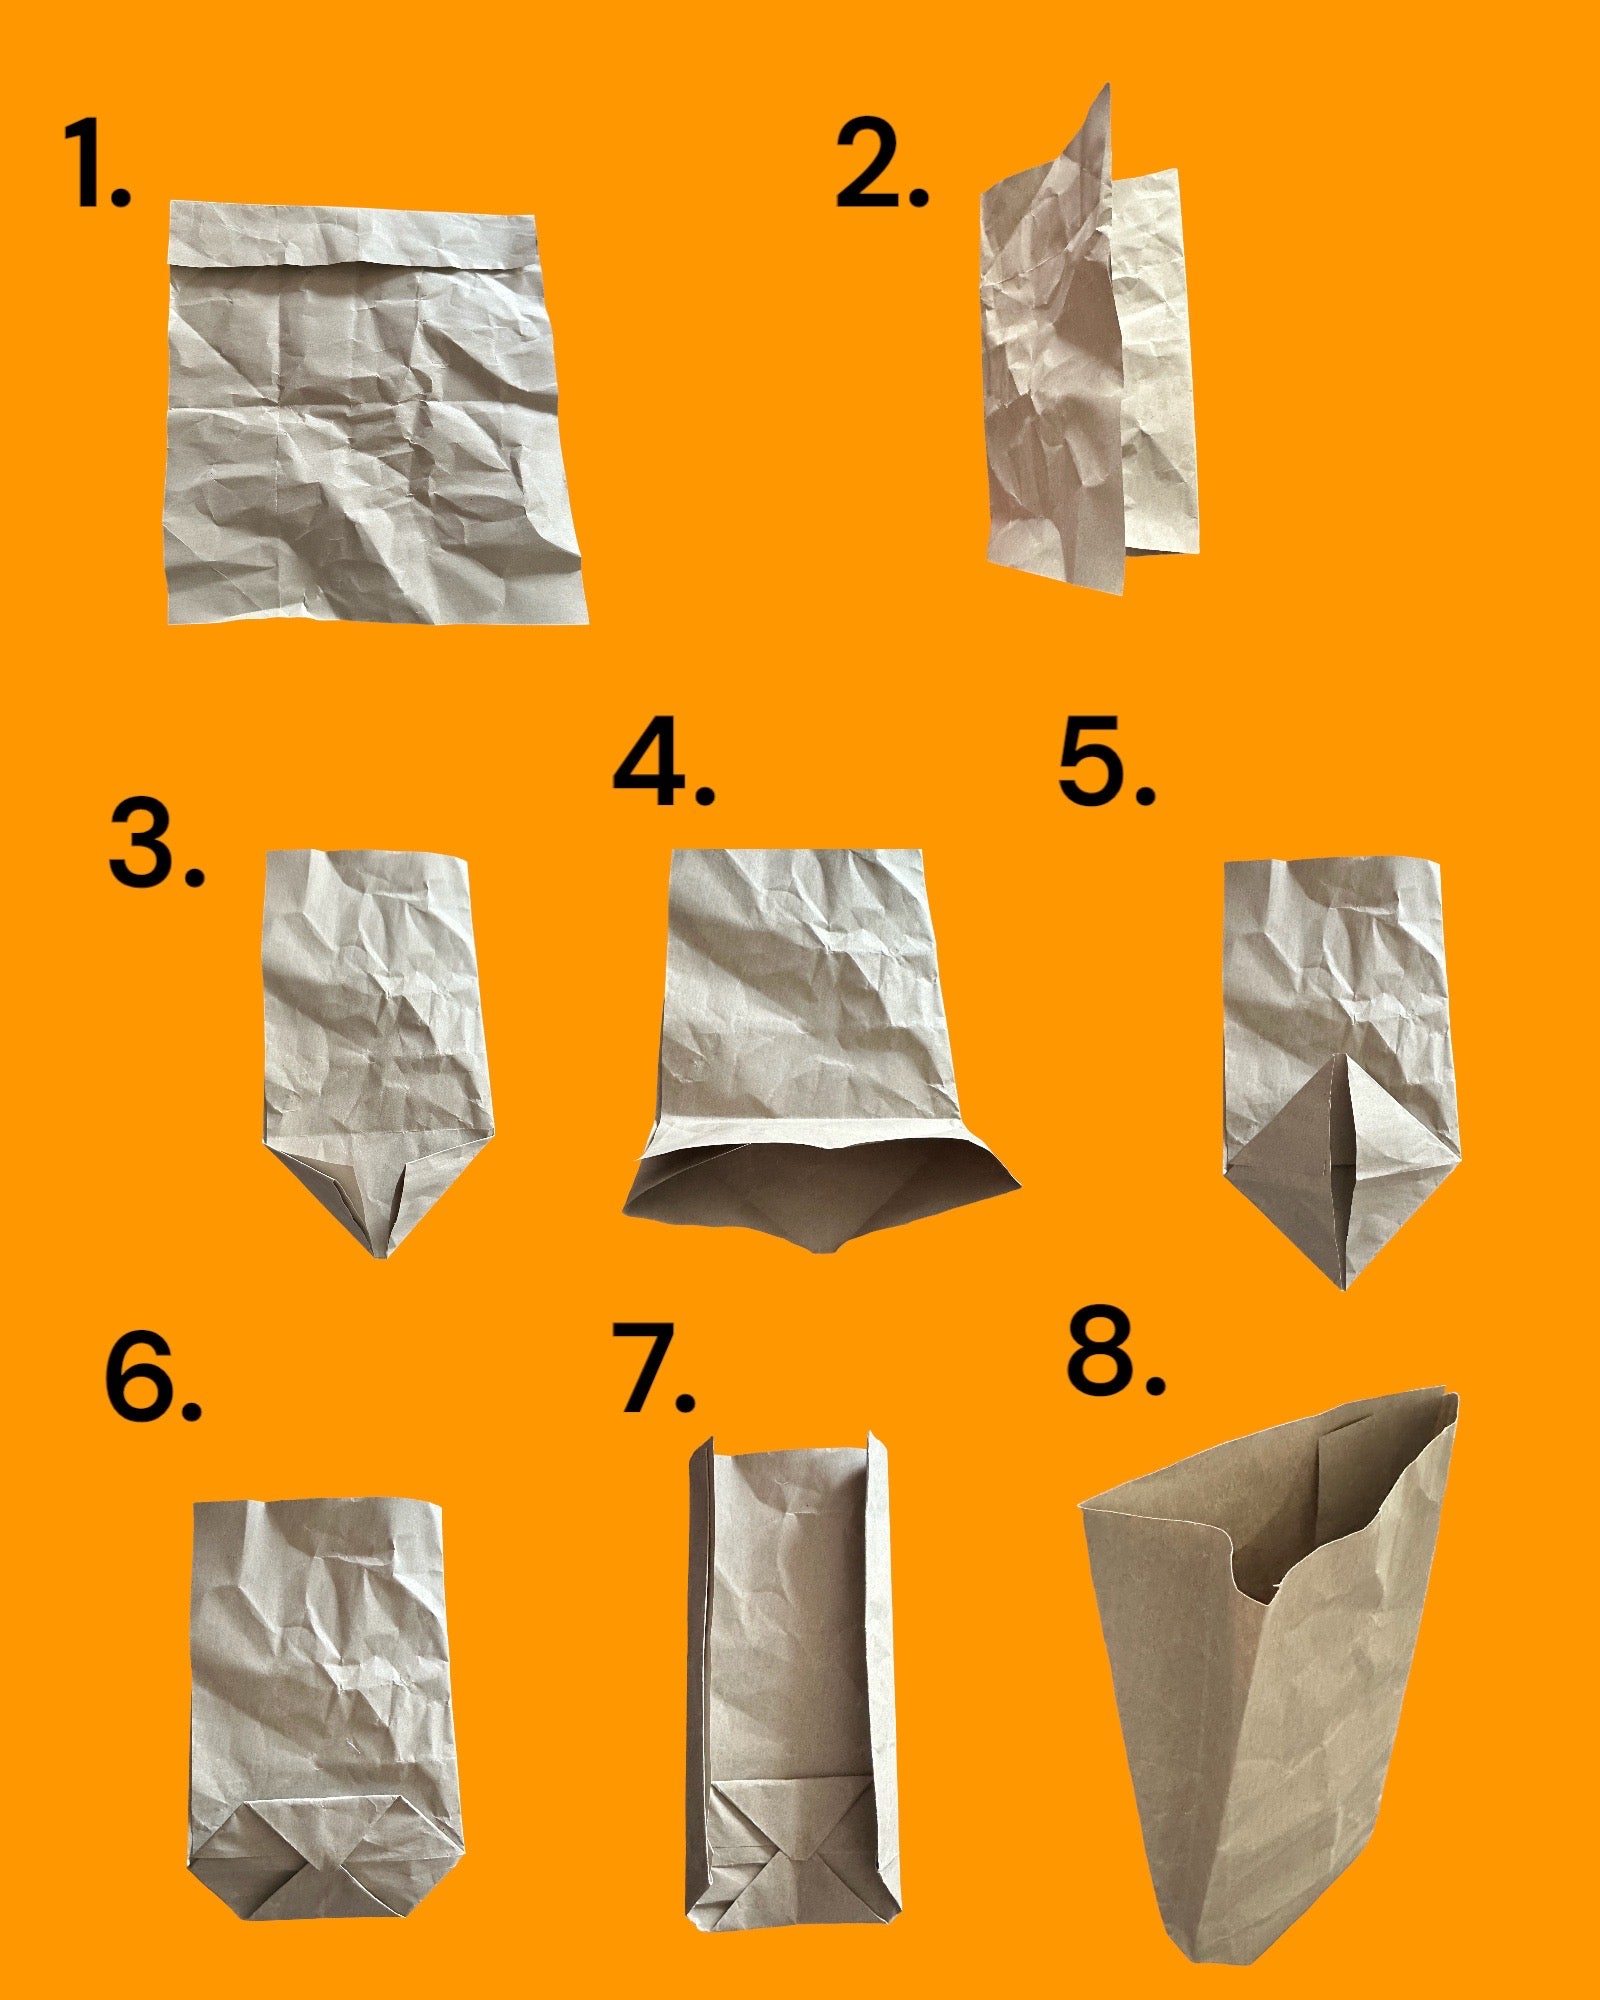
Start with step 1 by laying the sheet of paper or cardboard horizontally in front of you. Then fold the paper on the right side so that a border about two centimeters wide remains.
Step 2:
Now you can fold the edge to the left and glue it.
Step 3:
Now it's time to create the bottom of your bag. To do this, take the bottom edge and fold it up about two inches and then back again.
Step 4:
Now take the bottom left and right corners of the previously folded edge and fold them upwards to the fold line. Turn the bag over and repeat the process on the back.
Step 5:
Now you need to pull the bottom of the bag apart and carefully smooth out all the fold lines so that the bottom is flat.
Step 6:
Now take the top and bottom halves of the base and fold them towards the middle. Then glue the overlapping tips together.
Step 7:
To make the sides look nice, fold the bag in and out about two centimeters on the left and right. Once you open the bag, you can simply press the sides inwards - and your homemade paper bag is ready!
Your paper bag is ready:
The possibilities are endless when it comes to decorating the finished paper bags. Whether you cover them with colorful paper, ribbons or stickers or paint them with your own designs - you can let your creativity run wild here! Of course, you can also fill the bags to your heart's content, be it with homemade cookies, small gifts or other surprises.
And the best part? Our packaging materials make it super easy for you to create such great things! With just a few materials and a little creativity, you can create beautiful paper bags that are perfect for any occasion. Whether for birthdays, Christmas or just to make someone happy - homemade paper bags are always a great idea!
Small gift box

Small gift box
Step1:
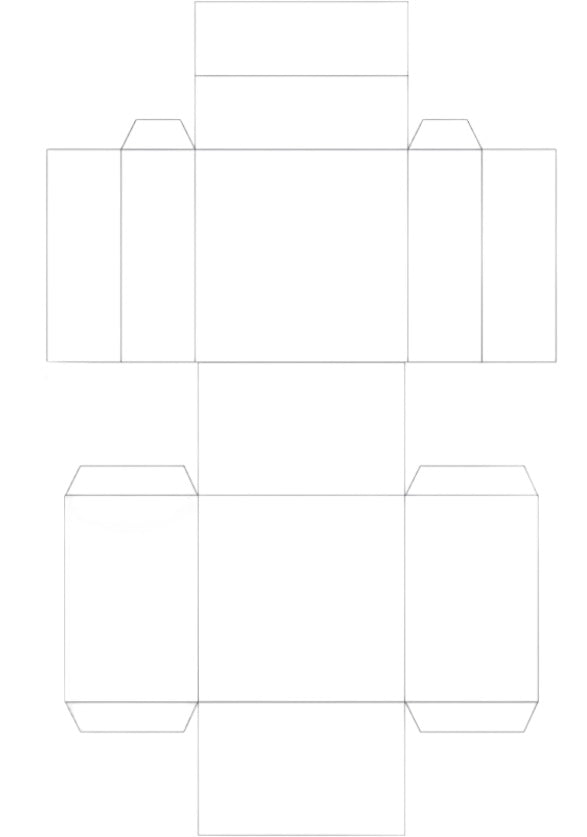
First, download the template for the gift box. Then you can cut out the outline of the template and use it as a stencil.
Cut out the outline of the gift box from the packaging material and cut along the dashed lines.
Step 2:
Now fold along the lines you have drawn and press the edges firmly. Then you can put little things in your box and give it away.
To close the box, simply fit the top curves together.
Your little gift box is ready
We should be more aware of the potential that lies in the things we use every day. These little gift boxes are a perfect example of this! They are not only suitable for rabbit and guinea pig owners, but for anyone who wants to give a loved one a little treat. With a little creativity and craftsmanship, you can conjure up something from the heart out of packaging material.
A bowl made from our packaging material:
Have you ever thought about making bowls out of papier-mâché, even using our packaging material?
No?
Let's try it out together because it's really easy and you only need a few things like:
our wrapping paper, paste, paint, cling film, gold leaf if desired and various bowls made of glass or plastic.
What you have to do now to make our paper bowl:
You now have to shred the paper or cut it into strips and soak it in water overnight.
The next day, pour off the water and add paste.
Then you can spread the mixture in several layers over the bowl and place it on the heater or in the sun until it is dry (about 24 hours).
Once the bowl is dry, you can remove it from the mold and paint it as desired or decorate it with gold leaf.
It's incredible how much you can do with our packaging material. You can reuse it and not only your rabbits and guinea pigs will enjoy our products, but you too can enjoy our packaging material. So go ahead and give it a try!
We look forward to your report in our Facebook exchange group about it ❤️
Bowl made from our wrapping paper

Bowl made from our wrapping paper
Step1:
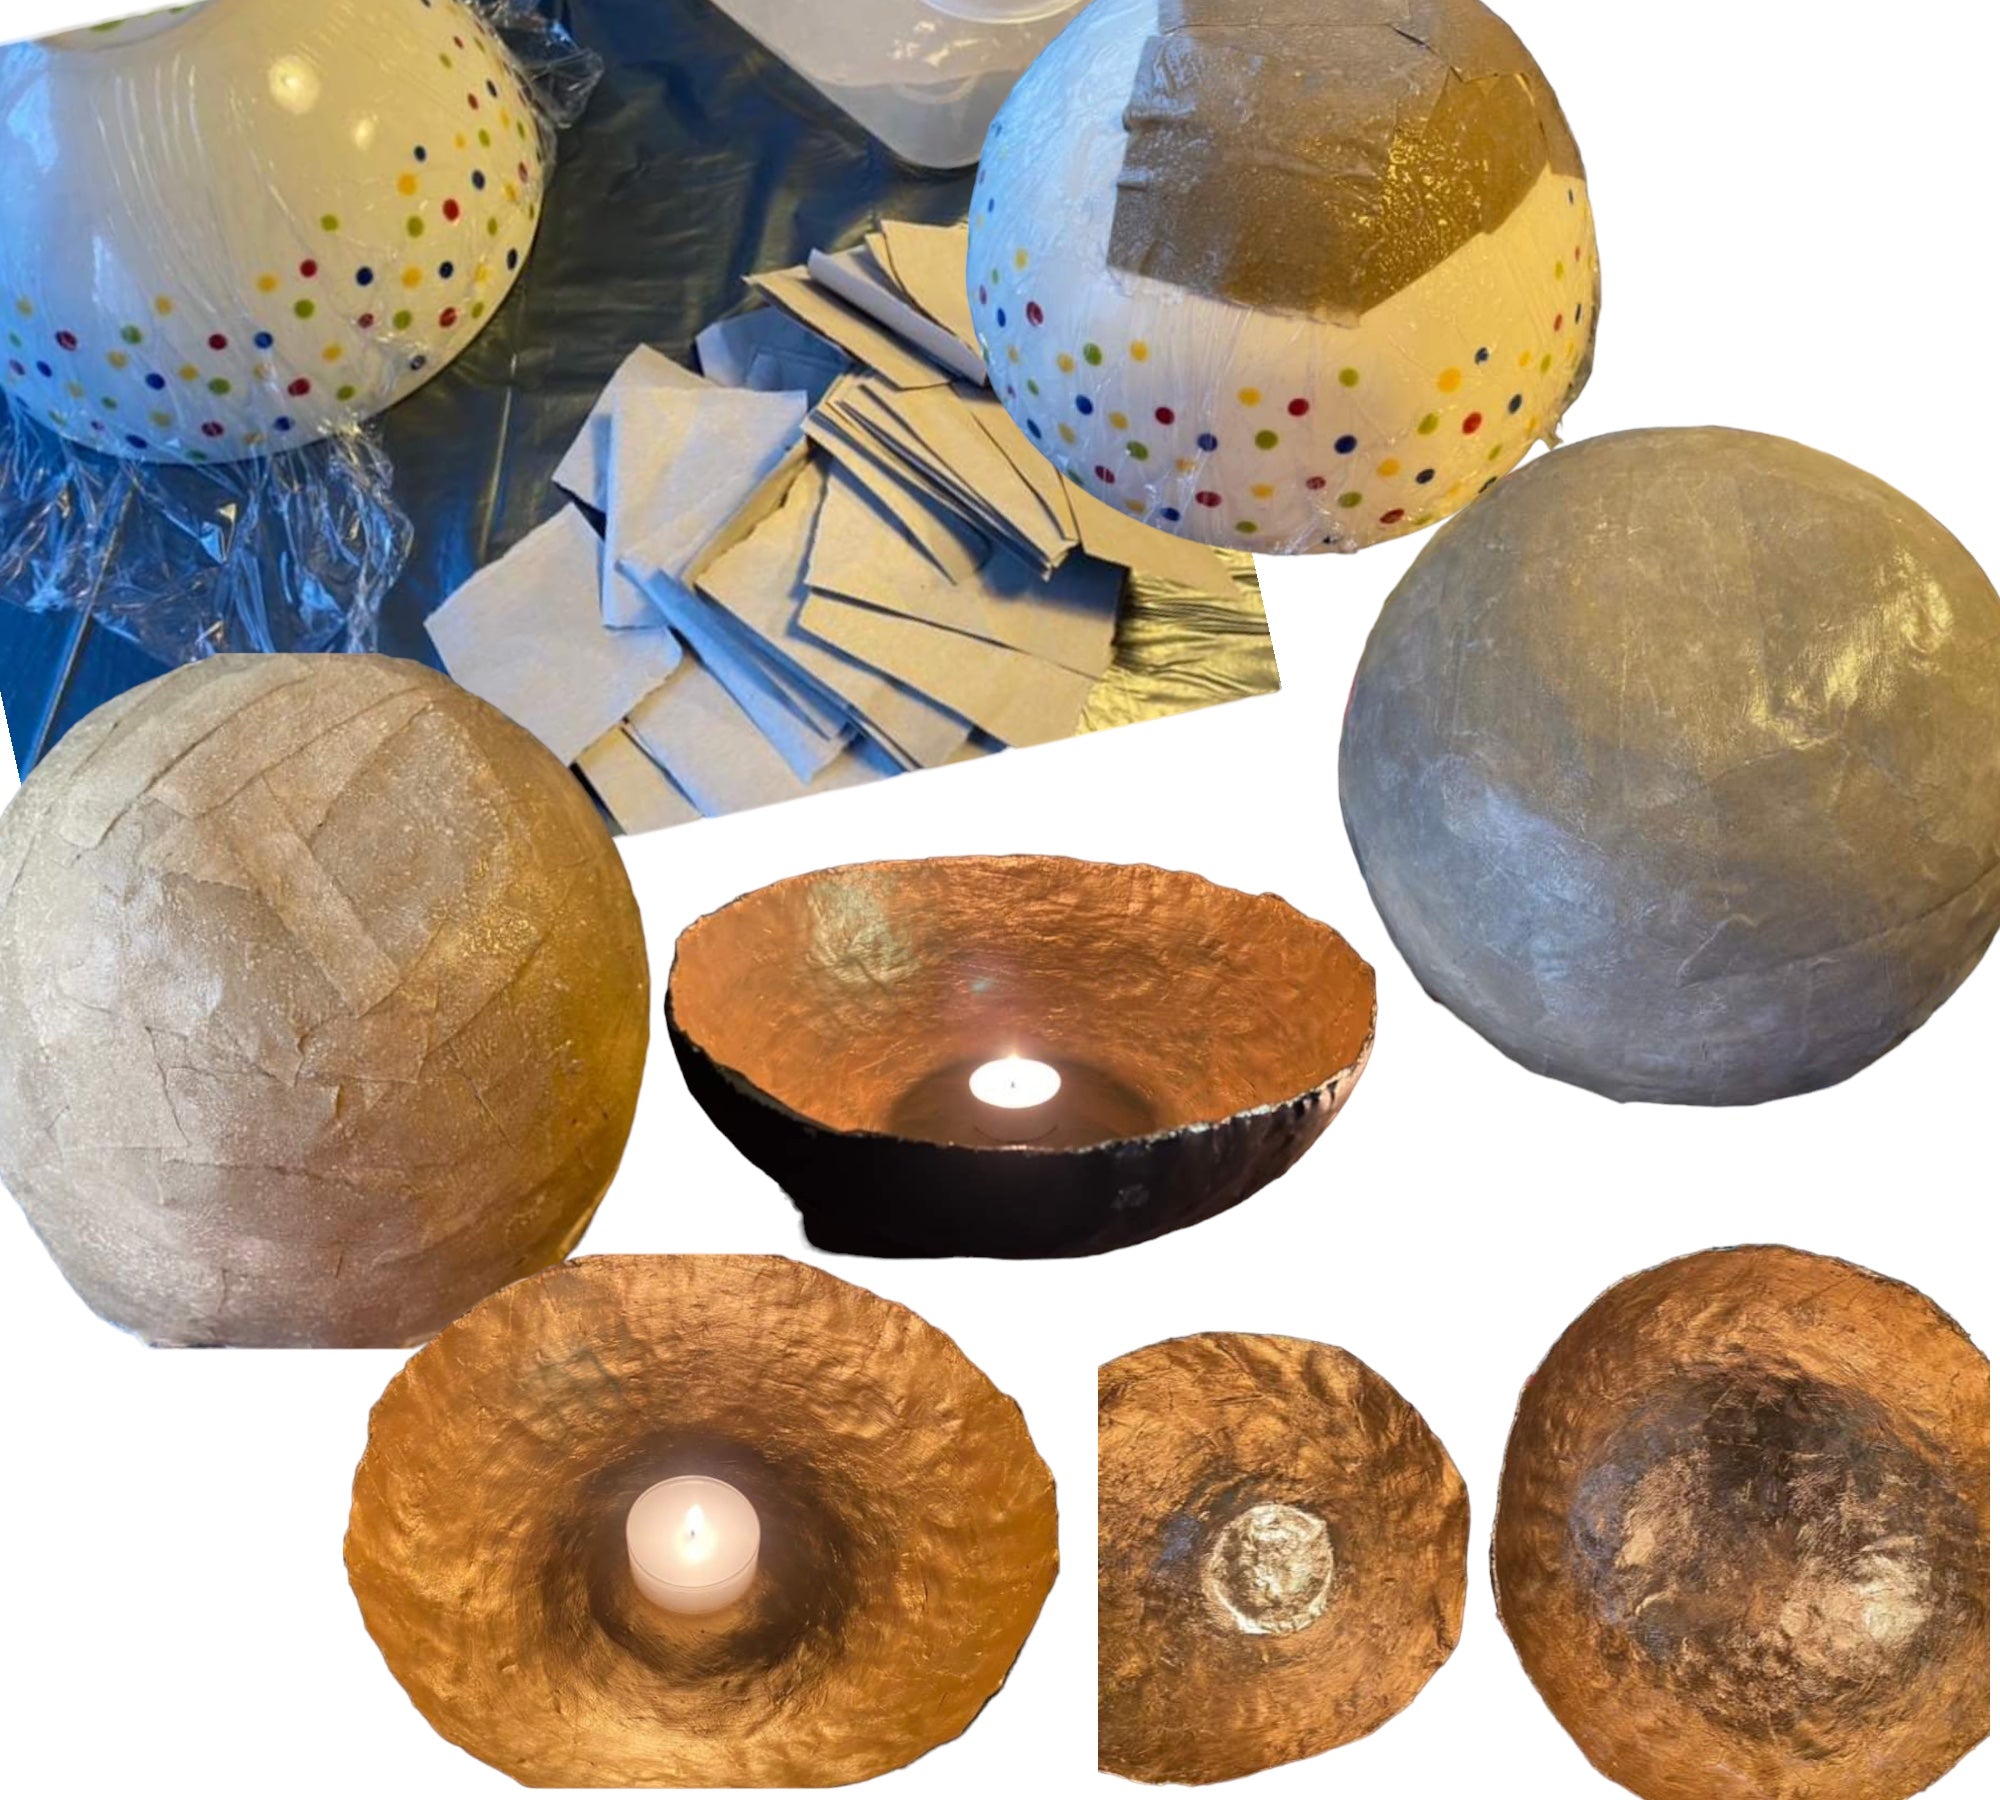
Tear the paper into 3-4cm wide strips using the ruler and then into smaller pieces by hand.
Step 2:
First, line your bowl with cling film and then mix the glue with water in a glass at a ratio of 1:1. Coat the inside of the bowl with the glue mix - this is now your "varnish". Then start putting the paper scraps in and paint over them well with the brush and press them down a little.
Step 3:
Let the bowl dry overnight and then carefully remove the cling film. The glue dries to a satin finish and no additional varnish is required.
- If you want your bowl to be food safe, you can paint over it with a water-based varnish (DIN Norm 71.3)
Your decorative bowl is ready
We should be more aware of the potential that lies in the things we use every day. These great and unique bowls are a perfect example of that!
They are not only suitable for rabbit and guinea pig owners, but for anyone who wants to give a loved one a little joy. With a little creativity and craftsmanship, you can conjure up something from the heart out of packaging material.
We hope that you have created a beautiful decorative bowl using our instructions and your own creativity. It is amazing how something special can be created from simple materials. This decorative bowl will certainly be an eye-catcher in your home and will bring you joy.
We encourage you to keep exploring and trying new possibilities. The world of crafts and DIY projects is full of potential to create things that are not only beautiful to look at, but also have a personal touch. Use your creativity to create unique gifts or to decorate your home with homemade decorative pieces.
Thank you for joining us on this little adventure. We hope we have inspired you and look forward to supporting you in further creative projects. Let your imagination guide you and discover the joy of making things yourself!

